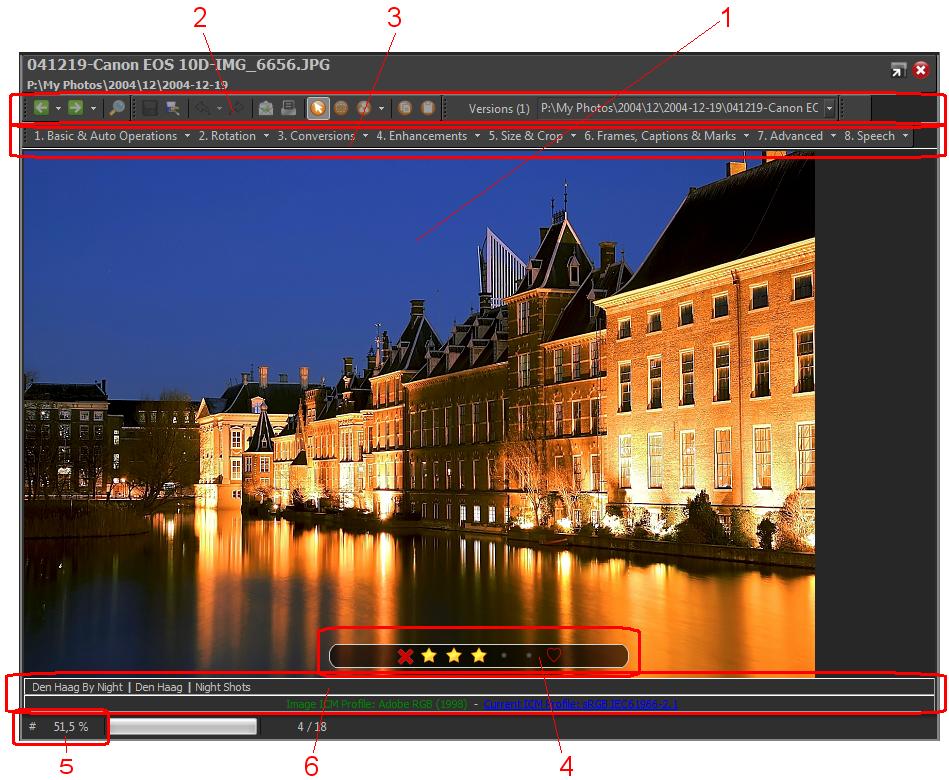
The Image Viewer/Editor looks as followed:

1 |
The Image Area
This area displays the active image. If you use color management, the image will be displayed in the defined monitor profile (Tools | Options | Color Management).
|
2 |
The control bar
The control bar is the bar that is positioned directly above the image. It contains entries for navigation, saving, printing, selections, etc.
|
3 |
The editing bar
This bar contains entries to all different editing effects. The bar is grouped into 8 different editing groups.
The Editing bar can be toggle on/off with [Ctrl]+[M]
|
4 |
The rating bar
Identical to thumbnails, the rating bar displays the image rating (score) and the color label that are assigned to the image.
The rating bar can be toggled on/off with [R]
|
5 |
The zoom bar
This bar displays the zoom percentage of the opened image in the current display. It also contains an visual identification to check if the displayed image is displayed with sharpening or not. If so, the text will be displayed in a yellow glow.
You can toggle sharpening with [Ctrl]+[Q]
The left # marker can be clicked to toggle a visual grid over the image.
|
6 |
Info bars
The info bars show the color management usage for this image and also a bar with short information about the active image. |